admin / 24.12.2017
Raspberry Pi 3: подключение и настройка (первый опыт использования) — IT-нищеброд
Содержание
- Raspberry Pi Software Guide
- Getting an operating system
- The first time you power on
- What next?
- Raspberry Pi для начинающих
- Raspberry Pi — собираем и настраиваем компьютер для юного кибернетика Часть 1.
- What is a Python program?
- What can a Python program do?
- How to create and run a program in Python
- Урок по созданию ноутбука на Raspberry Pi и Arduino
Raspberry Pi Software Guide
So you’ve got a Raspberry Pi, and you’ve made sure you have all the physical equipment you need. Now what? It’s time to get yourself an operating system and boot up your Raspberry Pi.

Getting an operating system
The recommended operating system for use with the Raspberry Pi is called Raspbian. Raspbian is a version of GNU/Linux, designed specifically to work well with the Raspberry Pi. You have several options when it comes to getting hold of a copy of Raspbian.
Buy a pre-installed SD card
The easiest way to get NOOBS or Raspbian is to buy an SD card with the software already installed. You can get a pre-installed Raspbian card from RS or The Pi Hut.
Install Raspbian with NOOBS
NOOBS stands for New Out Of Box Software, and if you’ve never played around with GNU/Linux before, then it’s the best place to start. To begin with, it’s always a good idea to make sure you have formatted your SD card. You’ll need to make sure your computer has a built-in SD card reader, or you can use a USB SD card reader.
- Visit the SD Association’s website and download SD Formatter 4.0 for either Windows or Mac.
- Follow the instructions to install the software.
- Insert your SD card into the computer or laptop’s SD card reader and make a note of the drive letter allocated to it, e.g. .
-
In SD Formatter, select the drive letter for your SD card and format it.

Note: If your SD card has 64GB or more, it will automatically be formatted as exFAT, which is not compatible with NOOBS. Follow these instructions to force your SD card to format as FAT32 so that you can use NOOBS.
Download NOOBS files then drag and drop
-
Visit the official Raspberry Pi Downloads page.

-
Click on NOOBS.

-
Click on the Download ZIP button under ‘NOOBS (offline and network install)’, and select a folder to save it to.

- Extract the files from the zip.
- Once your SD card has been formatted, drag all the files in the extracted NOOBS folder and drop them onto the SD card drive.
- The necessary files will then be transferred to your SD card.
- When this process has finished, safely remove the SD card and insert it into your Raspberry Pi.
Download and image Raspbian directly
An alternative to using NOOBS to install Raspbian is to download and install the image directly. This is a faster process, and is great if you need to image multiple cards for a workshop or class.
-
Using a computer with an SD card reader, visit the official Raspberry Pi Downloads page.
-
Click on Raspbian.
-
Click on the Download ZIP button under ‘Raspbian Stretch with desktop’, and select a folder to save it to.

-
Extract the files from the zip.
- Visit etcher.io and download and install the Etcher SD card image utility.
- Run Etcher and select the Raspbian image you unzipped on your computer or laptop.
- Select the SD card drive. Note that the software may have already selected the right drive.
-
Finally, click Burn to transfer Raspbian to the SD card. You’ll see a progress bar that tells you how much is left to do. Once complete, the utility will automatically eject/unmount the SD card so it’s safe to remove it from the computer.

The first time you power on
Now that you have an operating system, you can slot your SD card into your Raspberry Pi and connect the power. Follow the hardware help section if you need assistance with this.
-
If you are using NOOBS and this is the first time your Raspberry Pi and SD card have been used, then you’ll have to select an operating system and let it install.

- If you downloaded Raspbian and imaged it using Etcher rather than NOOBS, then you will boot directly to the desktop environment of Raspbian and won’t need to wait.
What next?
Для начала работы с Raspberry Pi (RPi) вам понадобится несколько вещей:
Большинство из этих вещей у вас наверняка уже есть. Займемся приготовлениями.
Загрузка образа системы
Сперва необходимо установить свежую версию операционной системы на вашу карту памяти. Для этого проследуйте на официальный сайт https://www.raspberrypi.org.
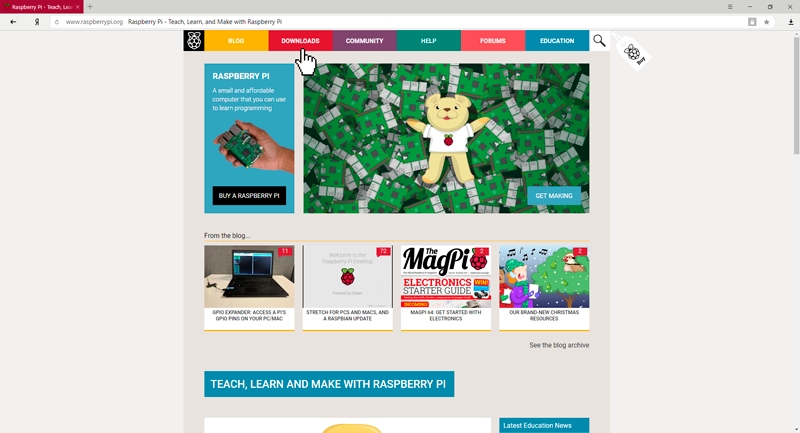
На верхней панели сайта выберите вкладку Downloads. На выбор вам будут доступны образы самых различных систем, но для начала мы остановимся на самом распространенном варианте — официальном дистрибутиве Raspbian от разработчиков.

На этой страничке представлены самые последние версии операционной системы. Для загрузки доступны два варианта: полный образ системы и облегченная версия. Выберем полный образ, чтобы в дальнейшем не подгружать недостающие компоненты.

Скачайте ZIP-архив с образом системы и дождитесь завершения загрузки файла на ваш компьютер. Архив должен находиться в папке «Этот компьютер > Загрузки», при условии что вы не меняли место сохранения загруженных файлов из интернета. Разархивируйте файл в любое место на вашем компьютере и откройте появившуюся папку. В папке находится файл образа диска, который необходимо будет записать на карту памяти для работы с Raspberry Pi.
Запись образа системы
Для записи образа на карту памяти мы воспользуемся простой утилитой Etcher. Сперва откройте сайт https://etcher.io и загрузите программу на свой компьютер.

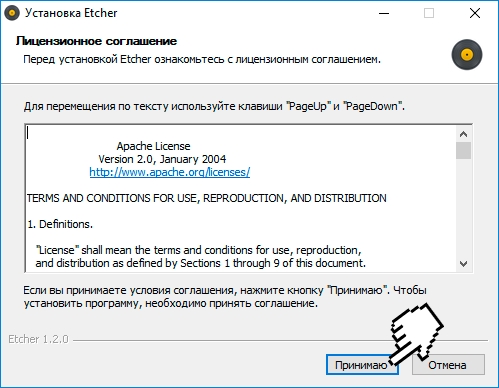
Установим Etcher. Для этого перейдите в паку с загруженным файлом и запустите установочный файл «Etcher-Setup-1.2.0-x64». Появится сообщение с лицензионным соглашением, с которым следует согласится. Нажмите на кнопку «Принимаю».
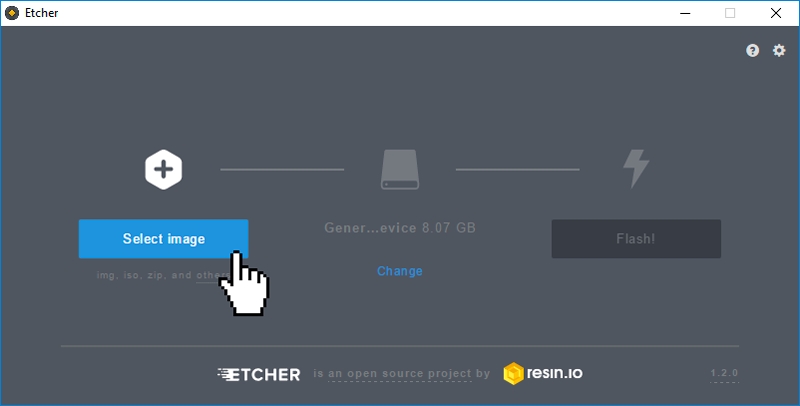
Дождитесь окончания установки. Теперь откройте программу (иконка Etcher добавилась на ваш Рабочий стол для быстрого запуска). Нам нужно выбрать файл образа диска (из скачанного ранее ZIP-архива) и правильный путь к нашей SD карточке памяти.
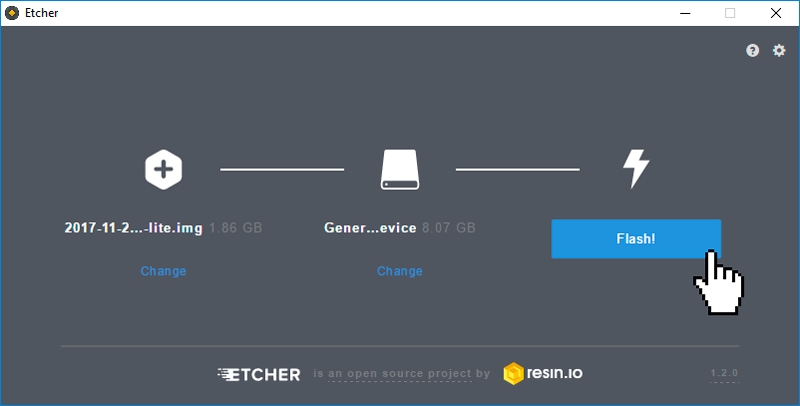
Дождитесь окончания процесса записи образа системы на карточку памяти, затем извлеките её из компьютера.
Подключаем RPi
- Поместите микрокомпьютер Raspberry Pi на ровную твердую поверхность.
- Вставьте карту памяти в разъем для MicroSD на нижней части платы.
Raspberry Pi для начинающих
Убедитесь, что она надежно зафиксирована в разъеме.
- Подключите провода для клавиатуры и мышки в разъемы USB.
- Подключите монитор к микрокомпьютеру с помощью кабеля HDMI.
- Подключите блок питания к разъему MicroUSB.
- Включите монитор, затем включите блок питания Raspberry Pi.
На микрокомпьютере нет отдельной кнопки включения, поэтому он запустится сразу после подачи питания. Если все прошло успешно, вы увидите стартовый экран ОС Raspbian. Поздравляем!
Установить операционную систему на Raspberry pi 2 очень просто ведь разработчики микрокомпьютера обо всем позаботились и выпустили NOOBS (New Out Of the Box Software). NOOBS — это простой установщик операционных систем, который уже содержит в себе Raspbian linux, Arch, OpenELEC, Pidora, RISC OS, RaspBMC, Ubuntu MATE, OSMC.

Что нужно для первого запуска Raspberry pi 2?
- microSD-карта не менее 4 Гб, классом не ниже 4;
- блок питания 5В, не менее 1,8 А;
- HDMI-кабель;
- Монитор с HDMI;
- USB мышь и клавиатура;
- ПК с SD картридером для записи установщика на microSD;
- Ethernet подключение к интернету.
Пошаговая установка ОС на Raspberry pi 2.
- Форматируем microSD в FAT32. Здесь подойдет любая программа для управления разделами дисков. Например в Debian удобно использовать partitionmanager (apt-get install partitionmanager).
- Скачиваем ZIP установщика NOOBS с официального сайта Raspberry pi.
- Распаковываем файлы из ZIP архива в корень microSD.
- Вставляем microSD в Raspberry pi, подключаем Ethernet и HDMI кабели, мышь и клавиатуру, включаем блок питания.
- При первом запуске появится список операционных систем, которые можно установить на ваш Raspberry pi. Не обязательно ограничивать себя одной ОС, можно выбрать хоть все (если позволяет объем microSD). Для новичков я рекомендую выбрать Raspbian linux и дистрибутив открытого медиацентра OpenELEC (Open Embedded Linux Entertainment Centre). При последующих запусках микрокомпьютера, система будет спрашивать, какую из ОС загружать.
Raspberry Pi — собираем и настраиваем компьютер для юного кибернетика Часть 1.
Нажимаем кнопку Install и ждем пока выбранные дистрибутивы скачаются и установятся на microSD карту.

После того, как процесс установки завершится, загрузится меню настройки Raspbian (raspi-config). Здесь настраиваем регион, язык, дату и время и др. Можно будет перенастроить ОС позже запустив команду sudo raspi-config в терминале. Нажимаем Finish.

Теперь можно запускать наш Raspberry pi. При каждом запуске Raspbian linux будет предложено ввести имя пользователя: pi
По умолчанию Raspbian root password: raspberry
Затем запускаем графическую оболочку командой: startx
Если помимо ОС Raspbian linux вы установили медиацентр, вы получаете массу видеофильмов, ТВ-передач, подкастов и др. бесплатно из коробки. Но на английском языке. Для возможности просмотра фильмов и и ТВ-передач на русском нужно установить русскоязычный XBMC плагин, например, seppius, который можно скачать здесь.
- Скачиваем этот ZIP-файл и кидаем его на флешку.
- Вставляем ее в Raspberry pi.
- Запускаем Raspberry pi под OpenELEC.
- Переходим Настройки -> Дополнения -> Установить из файла ZIP
- Выбираем наш файл на флешке
Теперь можно добавлять русскоязычные приложения в наш медиацентр.
In this post, I’ll give a quick overview of what a Python program is, what they can be used for, and finally, how to write and run a simple program on the Raspberry Pi.
What is a Python program?
The Python programming language actually started as a scripting language for Linux. Python programs are similar to shell scripts in that the files contain a series of commands that the computer executes from top to bottom. Python is a very useful and versatile high level programming language, with easy to read syntax that allows programmers to use fewer lines of code than would be possible in languages such as assembly, C, or Java.
Compare a “hello world” program written in C vs. the same program written in Python:
Python programs don’t need to be compiled before running them, as you do with C programs. However, you will need to install the Python interpreter on your computer to run them. The interpreter is the program that reads the Python file and executes the code. There are programs like Py2exe or Pyinstaller that can package Python code into stand-alone executable programs so you can run Python programs on computers without the Python interpreter installed.
What can a Python program do?
Like shell scripts, Python can automate tasks like batch renaming and moving large amounts of files. Using IDLE, Python’s REPL (read, eval, print, loop) function can be used just like a command line.
However, there are more useful things you can create with Python. Programmers use Python to create things like:
- Web applications
- Desktop applications and utilities
- Special GUIs
- Small databases
- 2D games
Python also has a large collection of libraries, which speeds up the development process. There are libraries for everything you can think of – game programming, rendering graphics, GUI interfaces, web frameworks, and scientific computing.
Many (but not all) of the things you can do in C can be done in Python. Computations are slower in Python than in C, but its ease of use makes Python an ideal language for prototyping programs and applications that aren’t computationally intensive.
How to create and run a program in Python
We will only cover the basics of writing and executing a Python program here, but for a great tutorial covering everything a programmer needs to know about Python, you might want to check out the bookLearning Python 5th Ed. (O’Reilly) by Mark Lutz.
Python 2 and Python 3 come pre-installed on Raspbian, but to install it on another Linux OS or to update it, simply run sudo apt-get install python3 or sudo apt-get install python. To access Python from the command prompt, type “python” or “python3” depending on which version you want to use. This opens up the Python REPL (read-eval-print-loop), from which you can enter Python commands just like you use the command line. Use Ctrl-D to exit the REPL:
Our first program in Python will be the standard “hello world” program. To begin, enter sudo nano hello-world.py at the command prompt to open the nano text editor and create a new file named hello-world.py.
Enter this code into nano, then press Ctrl-X to exit and save the file:
All Python program files will need to be saved as “.py” file types. You can write the program in a text editor such as notepad or notepad++ as long as you save the file with a “.py” extension.
To run the program without making it executable, navigate to the location where you saved your file, and type python hello-world.py.
We can make the hello-world.py file executable by entering chmod +x hello-world.py at the command prompt.
Урок по созданию ноутбука на Raspberry Pi и Arduino
Now, all we need to do to run the program is enter: ./hello-world.py.
Here are some additional resources that will help you make the most out of programming in Python:
Hopefully you found this post useful. If you have any questions, feel free to leave a comment below. Also, if you know someone who would enjoy this article, please share it! You can also get updates when ever we post a new article by entering your email address in the subscribe box below…
FILED UNDER : IT